Imagine the joy of breathing new life into a weathered piece of wood or transforming a rough surface into a canvas of perfection. This is the magic of hook-and-loop sandpaper. It’s not just a tool; it’s a bridge between your creativity and the material world. In the following comprehensive guide, we’ll unravel the secrets of this remarkable sanding companion. From its humble beginnings to its indispensable role in DIY and woodworking projects, hook-and-loop sandpaper is here to make your crafting dreams a reality. So, fasten your seatbelt, because we’re about to embark on a journey where grit meets artistry, and every stroke tells a story.

What Is Hook And Loop Sandpaper?
At the core of many woodworking and DIY projects lies the ingenious “hook and loop” sanding method. This approach simplifies the attachment of sandpaper to power sanders, making it a favorite among enthusiasts and professionals. Unlike traditional adhesive-backed sandpaper, hook and loop sandpaper features a secure “hook loop” fastening system, allowing for quick changes and versatility across various power tools. In the following sections, we’ll explore the intricacies of hook and loop sandpaper, revealing its benefits and tips for achieving exceptional results.
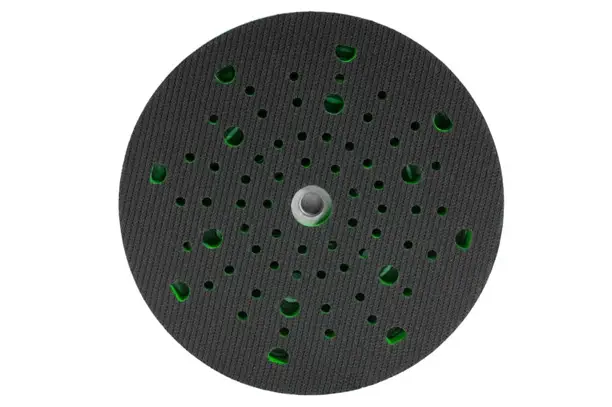
Why are there Holes in Sanding Discs?
If you’ve ever inspected a sanding disc closely, you might have noticed a pattern of tiny holes meticulously arranged across its surface. These holes, often referred to as “ventilation holes” or “dust extraction holes,” play a crucial role in the performance and effectiveness of hook and loop sanding discs.
So, why are there holes in sanding discs, and what purpose do they serve? Let’s dive into this intriguing aspect of sandpaper design and understand the benefits of these seemingly unassuming perforations.
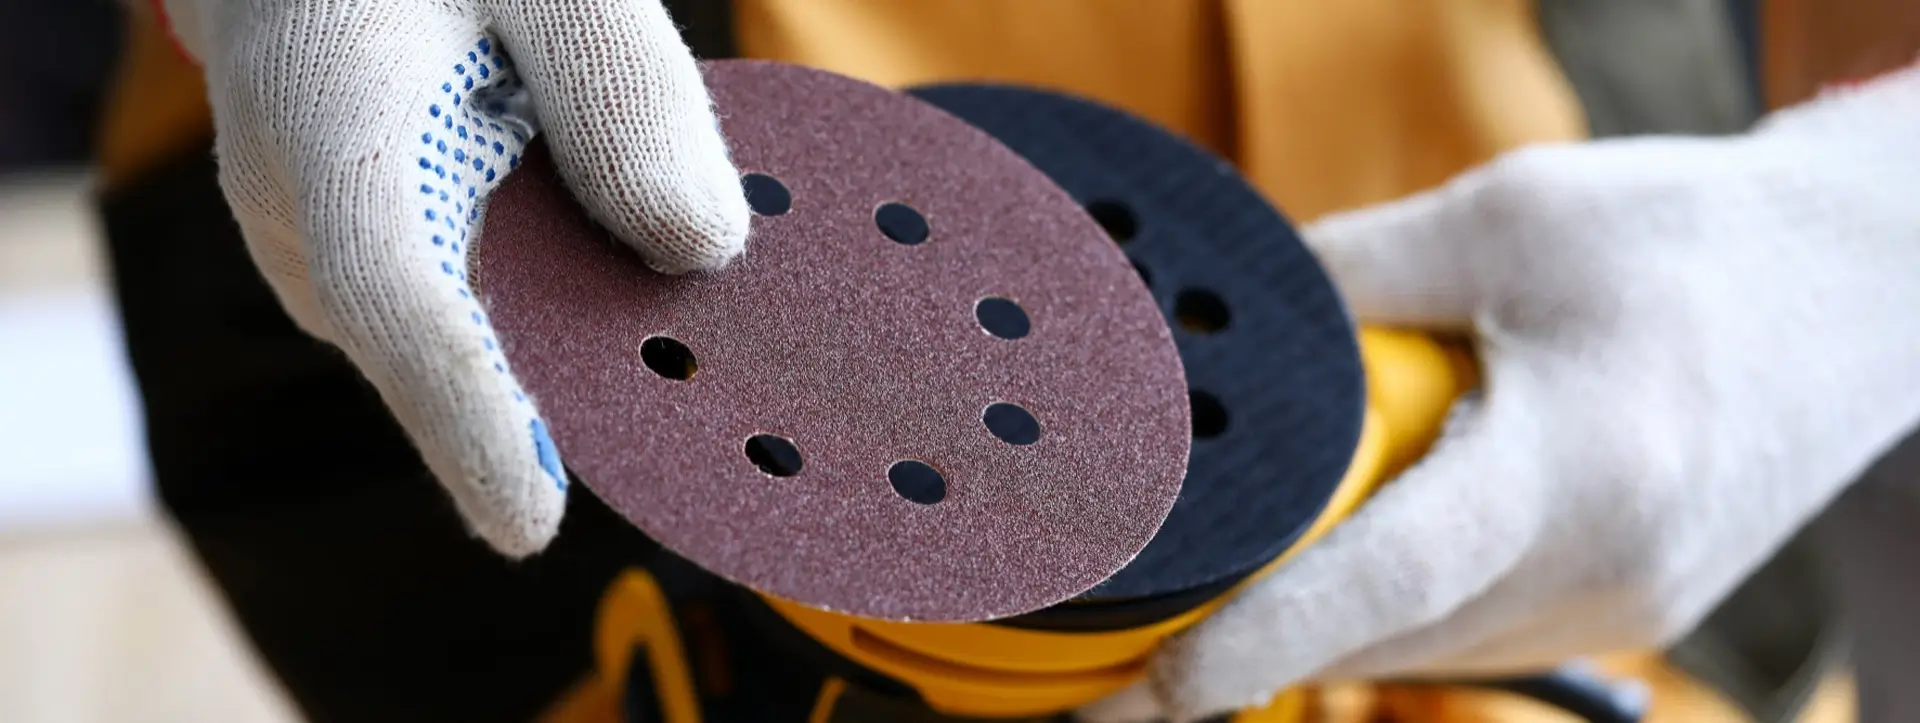
HOW TO ATTACH HOOK AND LOOP SANDING DISC

Attaching hook and loop sanding discs might seem straightforward, but achieving a secure and effective connection can make a significant difference in your sanding experience. Unlike traditional sandpapers with weak adhesives, hook and loop sanding discs offer a robust and dependable attachment method.
Prepare Your Sander: Before attaching the sanding disc, make sure your power tool is powered off and unplugged for safety. Ensure that the sanding pad is clean and free from debris.
Inspect the Sanding Disc: Take a close look at your hook and loop sanding disc. One side features the abrasive material, while the other has the loop backing designed to grip the hook on your sanding pad.
Align and Center: Position the sanding disc over the sanding pad, ensuring it’s centered. Most sanders have a Velcro tab that aligns with a corresponding Velcro tab on the sanding disc. This helps you achieve a precise fit.
Apply Little Pressure: With the sanding disc in position, apply little pressure initially. This allows the hook and loop fasteners to engage gradually and securely. Avoid pressing too firmly at this stage.
Power Up the Tool: Once the sanding disc is attached, power up your tool and start your sanding task. The tight connection ensures that the sanding disc stays in place during operation.
By following these simple steps, you’ll achieve a strong and reliable attachment of your hook and loop sanding disc to your power tool. This ensures that your sandpaper won’t fly off during use, allowing you to work with confidence and precision.
Choosing the Right Hook-and-Loop Sandpaper
When it comes to choosing the right hook-and-loop sandpaper for your project, several factors need to be considered:
- Grit Selection: The grit of sandpaper determines how coarse or fine it is. Lower grit numbers (e.g., 40 to 80) are suitable for heavy material removal, like rough wood or paint removal, while higher grit numbers (e.g., 180 to 400) are for finer finishing work. Select the grit based on the nature of your project. Start with a coarser grit and gradually progress to finer grits for a smooth finish.
- Material Compatibility: Consider the material you’re working on. Some materials may require specific types of abrasive materials. For example, aluminum oxide is versatile and works well on wood and metal, while silicon carbide is better suited for sanding plastics and non-ferrous metals.
- Sander Type: The type of sander you’re using can influence your sandpaper choice. Disk sanders, orbital sanders, and belt sanders often have specific sandpaper requirements. Check the manufacturer’s recommendations or your sander’s user manual for guidance.
- Quality and Brand: Invest in quality hook-and-loop sandpaper from reputable brands. Cheaper options might wear out quickly or not provide consistent results. Look for well-known brands that offer durability and performance.
- Project Goals: Consider the final finish you want to achieve. If you’re looking for a smooth, polished surface, you’ll need fine-grit sandpaper. However, if you’re preparing a surface for painting or staining, you may use coarser grits to remove imperfections.
Using Hook-and-Loop Sandpaper Effectively
To achieve the best results with hook-and-loop sandpaper, it’s essential to use it effectively:
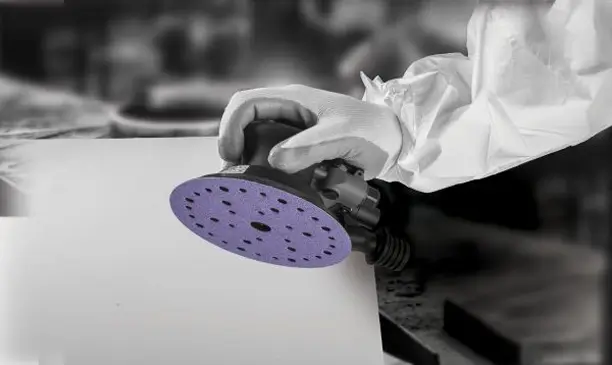
- Proper Sanding Technique: Begin with the appropriate grit for your project and work systematically. Apply even pressure and move the sander in the direction of the wood grain or as recommended for your material. Avoid pressing too hard, which can lead to uneven sanding.
- Grit Progression: Start with a coarser grit and progressively move to finer grits. Each grit should remove the scratches from the previous one, resulting in a smoother surface.
- Sanding Patterns: Change the sandpaper direction frequently to avoid creating deep scratches or uneven surfaces. Crosshatch or circular sanding patterns can help achieve a consistent finish.
- Safety First: Always wear safety gear, including safety glasses and a dust mask, when sanding. Hook-and-loop sanders generate dust and debris that can be harmful if inhaled or gets into your eyes.
- Clean and Maintain Sandpaper: Periodically clean your hook-and-loop sandpaper during use. Tap it gently to remove loose debris, or use a rubber sanding block to clean the abrasive surface. Replace worn-out sandpaper promptly for optimal results.
What’s The Difference Between PSA Pad Sandpaper And Hook-And-Loop Sandpaper?
In the world of sanding, two popular methods for securing sandpaper to power tools stand out: Pressure-Sensitive Adhesive (PSA) pad sandpaper and hook-and-loop sandpaper. Each of these attachment systems has its own advantages and best-suited applications.
PSA Discs (Pressure-Sensitive Adhesive):
- PSA sandpaper utilizes a strong adhesive backing that sticks directly to the sanding pad of your power tool.
- This method offers a firm and secure connection, suitable for tasks where you need precise control, like hand sanding or stationary sanders.
- PSA sandpaper doesn’t have the tiny loops and hooks found in the hook-and-loop system, making it a good choice for tasks that generate less heat and friction.
Hook-and-Loop Sandpaper:
- The hook-and-loop system, as discussed earlier, uses tiny loops on the sandpaper that attach to hooks on the sanding pad.
- This method is known for its convenience and versatility. It allows for quick changes and adjustments, making it ideal for tasks that require frequent grit changes or for users who employ various power tools.
- Hook-and-loop sandpaper is often used with orbital sanders and other power tools equipped with Velcro-like sanding pads.
What Are The Benefits Of Hook And Loop Sanding Discs?
Hook and loop sanding discs have become a staple in the toolkit of both DIY enthusiasts and professionals. Their unique design and features offer several compelling benefits, making them an indispensable choice for many sanding applications, especially when paired with disc sanders, random orbital sanders, and other power tools.

- Effortless Attachment: The hook and loop system make attaching and detaching sanding discs a breeze. With hooks that latch onto the sanding pad, you can switch between grits or replace worn-out discs quickly, saving valuable time on your project.
- Secure Grip: The hooks on the sanding disc grip the corresponding loops on the sander’s backing pad with a secure and firm connection. This ensures that the sandpaper stays in place during operation, minimizing the risk of slippage or detachment.
- Versatility: Hook and loop sanding discs are compatible with a wide range of power tools, including disc sanders and random orbital sanders. The versatility of this attachment system allows you to tackle various tasks with ease, from aggressive material removal to fine finishing.
- Backing Material Options: Hook and loop sanding discs come with different backing material options, such as foam or paper. These choices cater to specific requirements, including contoured surfaces, high durability, or anti-clogging properties.
- Dust Extraction: Some hook and loop discs feature built-in dust extraction holes. When used with compatible sanders, these discs help keep your work area clean by efficiently collecting dust and debris, enhancing both safety and visibility.
- Cost-Efficiency: While hook and loop sanding discs may cost slightly more than their adhesive-backed counterparts, their reusability and ease of change contribute to long-term cost savings.
- Consistent Results: The secure grip and uniform pressure distribution provided by the hook and loop system result in more consistent sanding results, reducing the likelihood of uneven surfaces.
Is Hook And Loop The Same As Velcro?
You’ve probably heard the terms “hook and loop” and “Velcro” used interchangeably, but are they really the same thing?
Hook and Loop:
- The term “hook and loop” refers to a fastening system that consists of two components: tiny hooks and loops.
- It is commonly used in sanding discs, straps, and other applications where a secure but detachable connection is needed.
- In hook and loop sanding discs, the abrasive side features tiny loops, while the sanding tool’s backing pad has corresponding hooks, creating a strong yet removable bond.
Velcro:
- Velcro is a brand name that has become synonymous with the hook and loop fastening system.
- Velcro Industries, founded by George de Mestral, popularized this system in the mid-20th century.
- While Velcro is a well-known and trusted brand for hook and loop products, it represents just one manufacturer among many.
In summary, “hook and loop” is the generic term for this type of fastening system, while “Velcro” is a specific brand that produces products using this technology. Think of it like saying “tissue” for facial tissue, but “Kleenex” for the specific brand. Understanding this distinction can help you appreciate the versatility and usefulness of hook and loop systems in various applications, including the sanding discs we’ve been discussing.
Here Are Some Pointers to Keep Hook and Loop Sanding Discs from Flying Away
While hook and loop sanding discs offer a secure grip and convenience, there are instances where they may come loose during operation. To ensure a hassle-free and productive sanding experience, consider the following pointers to keep your hook and loop sanding discs firmly in place:
Clean the Surface
Before attaching the sanding disc, ensure that the sanding pad is clean and free from dust, debris, or old adhesive residues. A clean surface ensures a better connection.
Proper Alignment
Take your time to align the sanding disc with the backing pad properly. Ensure it’s centered and positioned evenly to maximize the contact area between the hooks and loops.
Gentle Pressure
When attaching the sanding disc, apply gentle pressure initially. Avoid pressing too hard, as this can cause premature wear and tear on the hooks and loops.
Avoid Overheating
Prolonged, high-speed sanding can generate excessive heat, which might weaken the adhesive properties of the hook and loop fasteners. Give your sander short breaks to prevent overheating.
Use Compatible Tools
Ensure that you’re using sanders and sanding pads designed for hook and loop sanding discs. Mismatched tools can lead to inadequate attachment.
Replace Worn Discs
As hook and loop sanding discs wear down over time, their grip may become less secure. Replace worn discs promptly to maintain a strong connection.
Regular Maintenance
Periodically inspect and clean the hooks and loops on both the sanding disc and the sanding pad. Remove any debris or dust that might hinder their connection.
Pressure Distribution
Apply even pressure during sanding to distribute the force evenly across the disc. This helps maintain a secure grip and prevents premature detachment.
By following these pointers, you can minimize the chances of your hook and loop sanding discs flying away during use. With proper care and attention, you’ll enjoy the benefits of this versatile sanding system while achieving smooth, professional results in your woodworking and DIY projects.